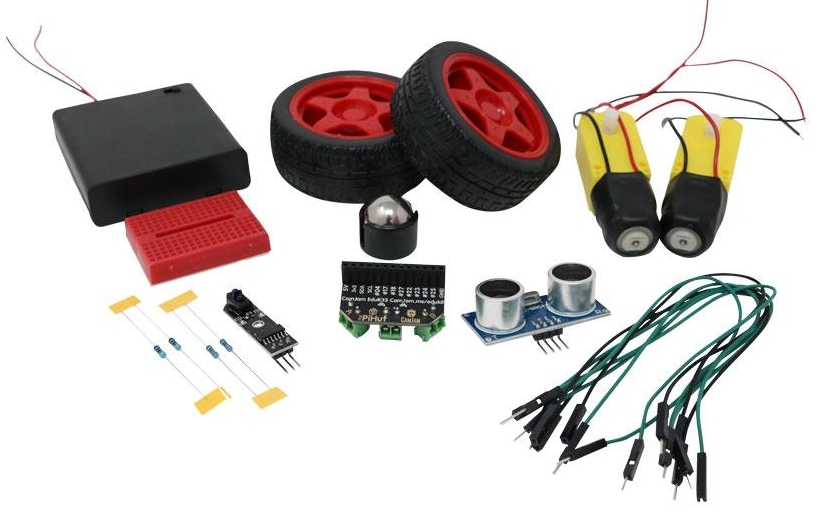
Contents of CamJam EduKit 3

- A custom-designed, pre-soldered motor controller board (with screw terminals)
- Two DC motors (with wires pre-soldered)
- Two custom red wheels (which go extra fast… because they’re red!)
- A ball castor (used as the ‘third wheel’ to your robot)
- A small breadboard (to create your circuits)
- Two pieces of strong 3M padded double-sided tape
- A battery box for 4 AA batteries (batteries not included)
- An ultrasonic distance sensor (for detecting objects in front of your robot)
- A line follower sensor (for detecting and following black lines)
- Resistors and jumper cables with which to complete your circuits
- A strong cardboard box to keep it all in… or to cut into to make your chassis!
You will need to provide:
- A Raspberry Pi (any version, including the Pi Zero) SD card and power supply.
- A keyboard and mouse. (Pi Zero may require a USB hub and/or adapter)
- A chassis – anything will do – use your imagination (or you can use the box it comes in!)
- 4 x AA batteries to power the motors.
Buying the EduKit
CamJam EduKit 3 is available from The Pi Hut.
Worksheets
The CamJam EduKit worksheets use the Python 3 programming language with the GPIO Zero library, which is pre-installed on the Raspberry Pi Operating System available from raspberrypi.org.
These worksheets are suitable for use with all of the Raspberry Pi microcomputers. Please make sure to read the instructions carefully for any notes relevant to your particular model.
The components can also be used with microcontrollers, including the Raspberry Pi Pico, although we do not have worksheets written specifically for them.
The following worksheets are available from GitHub.
- Introduction
- Building a robot
- Running the motors
- Driving and turning
- Line detector (you may also want to download the Test Line)
- Distance
- Control and calibration
- Line follower (you may also want to download the Line following course)
- Obstacle avoidance
Remote control worksheets
These worksheets should all be considered as “Beta” (meaning they’re experimental, but tested at some point). Please feel free to give us some feedback!
- Instructions for using a PS3-alike controller from The Pi Hut. Controller available here.
- Instructions for using a Wii controller over Bluetooth
- Instructions for using a keyboard remote control over SSH
- Instructions for controlling the EduKit 3 robot from an app on an Android phone (courtesy of Gerard Kelly) BETA
- A variation on the Android app idea with Bluetooth serial (courtesy of Gerard Kelly) BETA
- Instructions for using a pair of micro:bits to control the Pi via radio.
Download everything
You can download all the worksheets and all the code from GitHub by using the following command on the Raspberry Pi:
git clone https://github.com/CamJam-EduKit/EduKit3
Licence
All CamJam EduKit worksheets are covered by a Creative Commons licence. CC-BY-NC-SA
The original Word document versions are available for re-use or translation by contacting us.
Mailing List
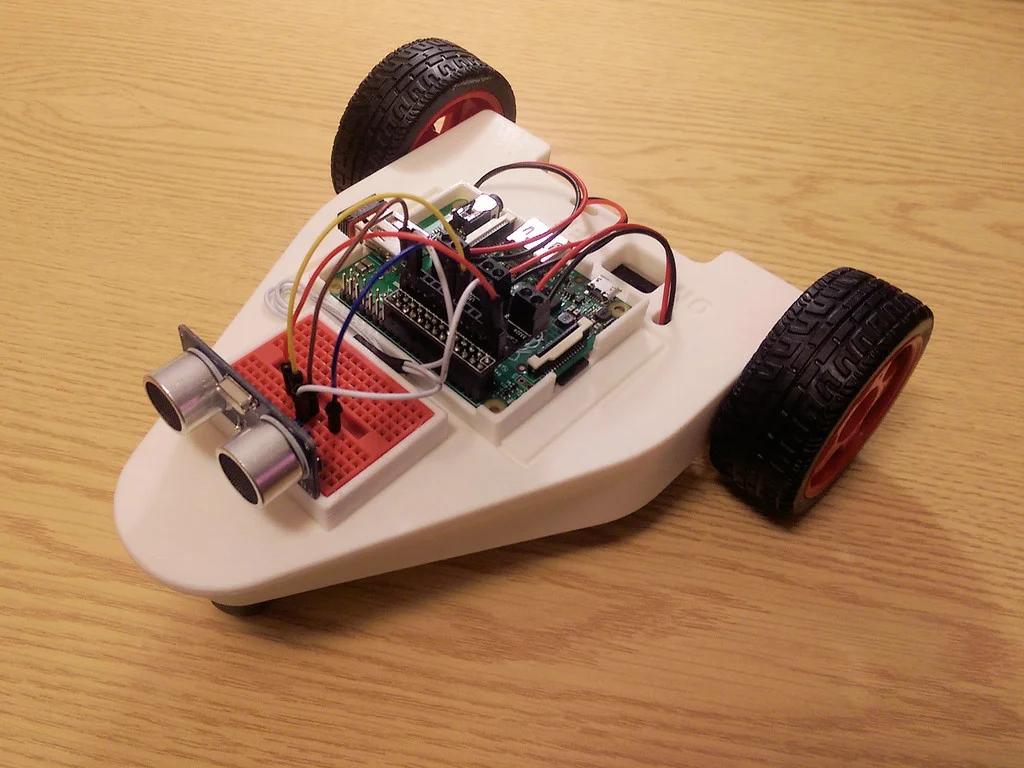
3D-printable Chassis

For those of you with access to a 3D printer, there is a fantastic chassis available. Designed by Daniel Bull, it is a sturdy chassis and everything slots in nicely. You can view and download the open source files on Thingiverse.
Videos
Michael Hart (Mike Loves Robots) has done a great series (2023) about the EduKit and you can find the playlist here. Here’s the intro video:
Here’s the great start of series from Matt Manning and family featuring version 2 of the kit:
Here’s a brilliant video from Alex Eames of a completed robot made using the version 1 kit and some easily available extra components:
Here’s an extensive unboxing and walk-through of the version 1 kit from The Raspberry Pi Guy (Matthew Timmons-Brown):
Here’s a video of the unboxing of the version 1 kit, provided by “Average Man” Richard Saville:
